Getting Started
In this tutorial, we are going to use example_project and its open_news app to walk you through how to integrate Scrapy Django Dashboard into a typical Django project.
The tutorial itself can be roughly divided into two parts:
Note
GitHub has ALREADY included the source code of this sample project.
Project Summary
The code scrapes the news URLs, thumbnails and excerpts from the main page of WikiNews. Further, it collects the news title from each news detail page. This might sound redundant at first, but it is a selected way to demonstrate the difference in Main Page (MP) and Detail Page (DP) as we deploy the spiders in a real project.
Note
The following instructions assume you have already finished the Installation successfully. (venv) means a virtual environment is activated in advance, which is considered as the best practice when running the code without the potential breaking OS global packages.
PART I
In Part I, we will mainly use prompt commands and a text editor to generate a minimal amount of boilerplate and other setting files manually.
Creating Example Project
Run this command:
(venv) django-admin startproject example_project
Note
This might not be the best practice when starting a new Django project, according to The Hitchhikers’ Guide to Python, which suggests the following command instead to avoid repetitive paths by appending . at the end.
(venv) django-admin startproject example_project .
However, this tutorial sticks with the official Django Tutorial Part 1 for the sake of consistency.
This results in a example_project/ in the root directory with a directory tree like this:
example_project/
    example_project/
        __init__.py
        settings.py
        urls.py
        wsgi.py
    manage.py
Now, let us navigate into example_project/.
(venv) cd example_project
Add scrapy_django_dashboard into INSTALLED_APPS in settings.py. For more detailed comments, check out example_project/example_project/settings.py on GitHub.
Creating Open News App
Next, we create open_news app by running this command in example_project/example_project/ (where manage.py resides).
(venv) python manage.py startapp open_news
This results in a open_news/ with a directory tree like this:
open_news/
    migrations/
        __init__.py
    __init__.py
    admin.py
    apps.py
    models.py
    tests.py
    views.py
Creating Open News App Models
In open_news app, we need to create at least two model classes. The first class stores the scraped data (Articles in our example), and the second one (NewsWebsite in our example) acts as a reference model class defining the origin/category/topic where the scraped items belong to.
Here is our model.py.
# example_project/example_project/open_news/model.py

from __future__ import unicode_literals
from django.db import models
from django.db.models.signals import pre_delete
from django.dispatch import receiver
from scrapy_djangoitem import DjangoItem
from scrapy_django_dashboard.models import Scraper, SchedulerRuntime
from six import python_2_unicode_compatible


@python_2_unicode_compatible
class NewsWebsite(models.Model):
    name = models.CharField(max_length=200)
    url = models.URLField()
    scraper = models.ForeignKey(
        Scraper, blank=True, null=True, on_delete=models.SET_NULL)
    scraper_runtime = models.ForeignKey(
        SchedulerRuntime, blank=True, null=True, on_delete=models.SET_NULL)

    def __str__(self):
        return self.name


@python_2_unicode_compatible
class Article(models.Model):
    title = models.CharField(max_length=200)
    news_website = models.ForeignKey(
        NewsWebsite, blank=True, null=True, on_delete=models.SET_NULL)
    description = models.TextField(blank=True)
    url = models.URLField(blank=True)
    thumbnail = models.CharField(max_length=200, blank=True)
    checker_runtime = models.ForeignKey(
        SchedulerRuntime, blank=True, null=True, on_delete=models.SET_NULL)

    def __str__(self):
        return self.title


class ArticleItem(DjangoItem):
    django_model = Article


@receiver(pre_delete)
def pre_delete_handler(sender, instance, using, **kwargs):
    if isinstance(instance, NewsWebsite):
        if instance.scraper_runtime:
            instance.scraper_runtime.delete()

    if isinstance(instance, Article):
        if instance.checker_runtime:
            instance.checker_runtime.delete()


pre_delete.connect(pre_delete_handler)
We have defined some foreign key fields referencing Scrapy Django Dashboard models. The NewsWebsite class refers to the Scraper model, which contains the main scraper with information about how to scrape the attributes of the article objects. The scraper_runtime field is a reference to the SchedulerRuntime class from Scrapy Django Dashboard models. This object stores the scraper schedules.
The NewsWebsite class also has to provide the url to be used during the scraping process. You can either use (if existing) the representative url field of the model class, which is pointing to the nicely-layouted overview news page also visited by the user. In this case we are choosing this way with taking the url attribute of the model class as the scrape url. However, it often makes sense to provide a dedicated scrape_url (you can name the attribute freely) field for cases, when the representative url differs from the scrape url (e.g. if list content is loaded via ajax, or if you want to use another format of the content - e.g. the rss feed - for scraping).
The Article model class has a class attribute called checker_runtime, a reference to SchedulerRuntime Scrapy Django Dashboard model class. This scheduling object holds information about the next check and evaluates if the news article still exists or it can be deleted (see Defining/Running item checkers) by using the url of Article.
Last but not least, Scrapy Django Dashboard uses the DjangoItem class from Scrapy to store the scraped data into the database.
Note
To have a loose coupling between the runtime objects and the domain model objects, we declare the foreign keys to the Scrapy Django Dashboard objects with blank=True, null=True, on_delete=models.SET_NULL. This prevents the reference object and the associated scraped objects from being deleted when we remove a Scrapy Django Dashboard object by accident.
Note
When we delete model objects via the Django admin dashboard, the runtime objects are not removed. To enable this feature,use Django’s pre_delete signals in your models.py to delete e.g. the checker_runtime when deleting an article
@receiver(pre_delete)
def pre_delete_handler(sender, instance, using, **kwargs):
    ....

    if isinstance(instance, Article):
        if instance.checker_runtime:
            instance.checker_runtime.delete()

pre_delete.connect(pre_delete_handler)
Configuring Scrapy
The common way to start a Scrapy project with boilerplate files is to run:
scrapy startproject my_scrapy_project
However, this approach does not save much time down the road, because the boilerplate code can not directly interact with Scrapy Django Dashboard app without manual configuration.
Therefore, the preferred way is to create scrapy.cfg file in example_project/ manually (where open_news/ resides). Further, create scrapy/ in open_news/, and add the following files according to this following directory tree.
example_project/
    example_project/
        __init__.py
        settings.py
        urls.py
        wsgi.py
    open_news/
        migrations/
            __init__.py
        scraper/  # Manually added
            __init__.py  # Manually added
            checkers.py  # Manually added
            pipelines.py  # Manually added
            settings.py  # Manually added
            spiders.py  # Manually added
        __init__.py
        admin.py
        apps.py
        models.py
        tasks.py  # Manually added
        tests.py
        views.py
    manage.py
    scrapy.cfg  # Manually added
Note
It is recommended to create a Scrapy project within the app of interest. To achieve this, create the necessary modules for the Scrapy project in a sub directory (scraper in our example) of this app.
Here is what scrapy.cfg looks like: (Make proper changes, such as app name in your own project.)
# example_project/example_project/scrapy.cfg

# Define open_news app scrapy settings
[settings]
default = open_news.scraper.settings

# Scrapy deployment using scrapyd
[deploy:scrapyd1]
url = http://localhost:6800/
project = open_news
And here is settings.py in example_project/example_project/open_news/scraper/.
# example_project/example_project/open_news/scraper/settings.py

from __future__ import unicode_literals
import os
import sys

PROJECT_ROOT = os.path.abspath(os.path.dirname(__file__))
os.environ.setdefault("DJANGO_SETTINGS_MODULE", "example_project.settings")
sys.path.insert(0, os.path.join(PROJECT_ROOT, "../../.."))

MEDIA_ALLOW_REDIRECTS = True

BOT_NAME = 'open_news'

LOG_LEVEL = 'DEBUG'

SPIDER_MODULES = [
    'scrapy_django_dashboard.spiders',
    'open_news.scraper',
]

USER_AGENT = 'Mozilla/5.0 (Windows NT 10.0; Win64; x64) AppleWebKit/537.36 (KHTML, like Gecko) Chrome/79.0.3945.130 Safari/537.36'

ITEM_PIPELINES = {
    'scrapy_django_dashboard.pipelines.DjangoImagesPipeline': 200,
    'scrapy_django_dashboard.pipelines.ValidationPipeline': 400,
    'open_news.scraper.pipelines.DjangoWriterPipeline': 800,
}

IMAGES_THUMBS = {
    'medium': (50, 50),
    'small': (25, 25),
}

DSCRAPER_IMAGES_STORE_FORMAT = 'ALL'
DSCRAPER_LOG_ENABLED = True
DSCRAPER_LOG_LEVEL = 'ERROR'
DSCRAPER_LOG_LIMIT = 5
The SPIDER_MODULES is a list of the spider modules of Scrapy Django Dashboard app and scraper package where Scrapy will look for spiders. In ITEM_PIPELINES, scrapy_django_dashboard.pipelines.DjangoImagesPipeline, a sub-class of scrapy.pipelines.images.ImagesPipeline, enables scraping image media files; scrapy_django_dashboard.pipelines.ValidationPipeline checks the mandatory attributes and prevents duplicate entries by examining the unique key (the url attribute in our example).
Note
Refer to GitHub for more detailed comments in open_news/scraper/settings.py.
To make Scrapy interact with Django objects, we need two more static classes: one being a spider class, a sub-class of DjangoSpider, and the other being a Scrapy pipeline to save scraped items.
Creating Scrapy Spider
Our ArticleSpider, a sub-class of DjangoSpider, references itself to the domain model class NewsWebsite.
# example_project/example_project/open_news/scraper/spiders.py

from __future__ import unicode_literals
from scrapy_django_dashboard.spiders.django_spider import DjangoSpider
from open_news.models import NewsWebsite, Article, ArticleItem


class ArticleSpider(DjangoSpider):

    name = 'article_spider'

    def __init__(self, *args, **kwargs):
        self._set_ref_object(NewsWebsite, **kwargs)
        self.scraper = self.ref_object.scraper
        self.scrape_url = self.ref_object.url
        self.scheduler_runtime = self.ref_object.scraper_runtime
        self.scraped_obj_class = Article
        self.scraped_obj_item_class = ArticleItem
        super(ArticleSpider, self).__init__(self, *args, **kwargs)
Creating Scrapy Pipeline
Scrapy Django Dashboard allows additional attributes to be added to the scraped items by requiring custom item pipelines.
# example_project/open_news/scraper/pipelines.py

from __future__ import unicode_literals
from builtins import str
from builtins import object
import logging
from django.db.utils import IntegrityError
from scrapy.exceptions import DropItem
from scrapy_django_dashboard.models import SchedulerRuntime


class DjangoWriterPipeline(object):

    def process_item(self, item, spider):
        if spider.conf['DO_ACTION']:
            try:
                item['news_website'] = spider.ref_object

                checker_rt = SchedulerRuntime(runtime_type='C')
                checker_rt.save()
                item['checker_runtime'] = checker_rt

                item.save()
                spider.action_successful = True
                spider.logger.info("{cs}Item {id} saved to Django DB.{ce}".format(
                    id=item._id_str,
                    cs=spider.bcolors['OK'],
                    ce=spider.bcolors['ENDC']))

            except IntegrityError as e:
                spider.logger.error(str(e))
                raise DropItem("Missing attribute.")

        return item
Note
We have added the reference object to the scraped item class. If you are planning to enable checker, create the runtime object for the checker. Make sure to set the action_successful attribute of the spider, which is used internally when the spider is closed.
Database Migration & Authorization
Now, we head back to example_project/ (where manage.py resides). When dealing a custom app (open_news in our example), we need to make database migrations:
(venv) python manage.py makemigrations open_news
This creates a SQLite database file in example_project/example_project/, called example_project.db. Feel free to change db location by changing example_project/example_project/settings.py as needed. Now, we can migrate the database.
(venv) python migrate
This creates a SQLite database file in example_project.db in example_project/example_project/. Feel free to change db location by tweaking example_project/example_project/settings.py as needed.
We also need an account to log into Django admin dashboard.
(venv) python manage.py createsuperuser
Fill out username, email and password. Next, power up the development server and load Django admin page.
(venv) python manage.py runserver
The default admin page should be http://localhost:8000/admin.
PART II
In Part II, our configurations take place primarily within Django admin dashboard.
Note
You can use load_data.sh script or the command below to load all objects of our example project to the database.
python manage.py loaddata example_project.json
Defining Scrapers
Log into Django admin dashboard, it should look similar to this:
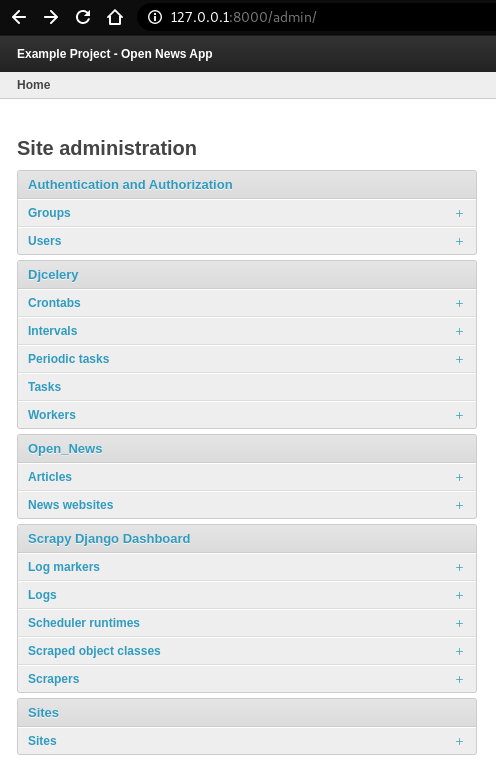
Note
Overview of Scraper Workflow
- The scraper collects the summary of a base element from a
Main Page (MP). - If instructed, the scraper continues gathering more information from a
Detail Page (DP)of each base element. - Finally, all items and their attributes scrapped either from a MP or DP, are saved into a database.
Select Scrapy Django Dashboard > Scrapers > + Add Scraper, and here is the screenshot.

Give the scraper a name Wikinews Scraper for our open news app.
Defining Scraped Object Class
Next, we need to define ScrapedObjClass. A Scraped obj class is basically the item which the app scrapes from the source. All attributes associated with this item need to be defined as well. In our example, an Article is the item, and its attributes includes the title, the description, the url and the thumbnail image. Click + icon and another window pops up. For open news app, the item name is Article. For its attributes, select one of the following types defined in scrapy_django_dashboard.models.ScrapedObjAttr:
ATTR_TYPE_CHOICES = (
    ('S', 'STANDARD'),
    ('T', 'STANDARD (UPDATE)'),
    ('B', 'BASE'),
    ('U', 'DETAIL_PAGE_URL'),
    ('I', 'IMAGE'),
)
BASE type is for the base attribute (an arbitrary definition), which is a parent node per se. STANDARD, IMAGE and DETAIL_PAGE_URL should be self-explanatory. STANDARD (UPDATE) allows new updates if there is an existing record. To prevent duplicate entries, we need to use one or more attributes as ID Fields. DETAIL_PAGE_URL is normally the ideal candidate for this purpose if available. Additionally, Defining/Running item checkers utilizes DETAIL_PAGE_URL type attributes to check and remove non-existing records. Here is the screenshot for our example app.

Save the settings. For now, set status to MANUAL, since we will run the spider from the terminal at the end of this tutorial. Here is what we have achieved so far.

Note
In case of using STANDARD (UPDATE) type, the process takes much more page requests, since the scraper reads a detail page of each item and compares the information against the database. If you are not planning to update the records, select STANDARD type instead.
Note
The order of each attribute determines the order listed in Scraper elems section. Use 10-based or 100-based scale for a easier resorting.
Locating Elements
Now, let us move down to Scraper elems section. Each element corresponds to the attribute we defined in Scraped obj class. By following the customs of Scrapy, we can use x_path or reg_exp to locate the information from the source. The request_page_type decides if the scraper should extract the data a Main Page or a Detail Page.
Note
WARNING: For every request_page_type, make sure to define a corresponding entry in Request page types section below.
processors and processors_ctxt define the output processors like those in Scrapy’s
Item Loader section. For instance, use the processor to add a string to the data or reformat the date. mandatory dictates whether the data is a required field. The whole item is dropped if the field is not available when mandatory box is checked. Be sure to “sync” mandatory checkbox with the corresponding attributes defined in the domain model class, otherwise the item will not be saved in the database.
In our example project, Wikinews is the source. Here is a screenshot of the html of Wikinews main page by using developer tools in Chrome:

Here is the header tag from the news article detail page:

Note
The WikiNews site structure changes over time. Make proper changes when necessary.
Based on those html structures, we formulate the XPATH for each element.
- Define a base element to capture DOM elements for news article summaries. On the main page, all news summaries are enclosed by
<td>tags with a class namel_box, and hence//td[@class="l_box"]should be sufficient.
- Define a base element to capture DOM elements for news article summaries. On the main page, all news summaries are enclosed by
- For demonstrating purpose, the code scrapes the news title from the article detail page. As seen in the screenshot above, the article title is enclosed by
<h1>tags with an idfirstHeading.string(//h1[@id="firstHeading"])should give us the headline. Since we want the scraper to get the title text from the detail page instead of the main page, let us select ‘Detail Page 1’ from the dropdown menu.
- For demonstrating purpose, the code scrapes the news title from the article detail page. As seen in the screenshot above, the article title is enclosed by
Note
You might have considered using //h1[@id="firstHeading"]/text(). The reason why we use string() is due to the fact that the news titles and short descriptions may contain additional html tags such as <i></i>. In such case, text() only gets the text up to the first inner element.
See StackOverflow discussion.
- All other elements are located relative to the base element. Therefore, be sure to leave out the double slashes. The short description resides within
<span>tag with a class namel_summary. The XPath isstring(p/span[@class="l_summary"]).
- All other elements are located relative to the base element. Therefore, be sure to leave out the double slashes. The short description resides within
- The XPath of url element is
span[@class="l_title"]/a/@href. Since the html only contains the relative path (without the domain), we use a predefined processor calledpre_urlto complete the url. Find more about predefined processors in thescrapy_django_dashboard.utils.processorsmodule - see Processors. Processors allows extra information through theprocessors_ctxtfield, and the data is passed in a dictionary-like format'processor_name': 'context'. For our example,'pre_url': 'http://en.wikinews.org'.
- The XPath of url element is
Finally, this is our Scraper elems section.

Note
You can also scrape attributes of the object from outside the base element by using .. notation in XPath expressions to get to the parent nodes!
Note
Attribute Placeholders allows you to customize detail page URLs with placeholders for main page attributes by using {ATTRIBUTE_NAME}.
Adding Request Page Types
For all request page types used in Scraper elems section above, we need to define the corresponding RequestPageType. We can only have one Main Page type object and up to 25 Detail Page type objects. In our example, we have one Main Page type object and one Detail Page type object.

Each RequestPageType object allows custom content type (HTML, XML or JSON), request method (GET or POST) and more for each individual page type. With this feature, for an example, it is possible to scrape HTML content from the main page and JSON content from the detail pages. For more information on this topic, see Advanced Request Options section.
For this tutorial, we just need to simply set Page type to Detail Page 1 for title attribute, and Main Page for the rest of the attributes. Here are the screenshots for further clarification.


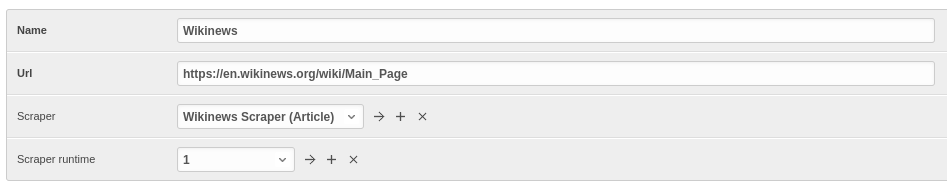
Creating Domain Entity
The last step is to add the reference object of our domain (a NewsWebsite object for the Wikinews site in our case). Open NewsWebsite form in Django admin dashboard > + Add news website, give the object a name ‘Wikinews’, assign the scraper and create an empty SchedulerRuntime object with SCRAPER as the runtime_type.
Running/Testing Scrapers
Running/testing scrapers from the command line is similar to starting Scrapy spiders, with some extra arguments. The command syntax is as follows:
scrapy crawl [--output=FILE --output-format=FORMAT] SPIDERNAME -a id=REF_OBJECT_ID
                        [-a do_action=(yes|no) -a run_type=(TASK|SHELL)
                        -a max_items_read={Int} -a max_items_save={Int}
                        -a max_pages_read={Int}
                        -a start_page=PAGE -a end_page=PAGE
                        -a output_num_mp_response_bodies={Int} -a output_num_dp_response_bodies={Int} ]
-a id=REF_OBJECT_IDspecifies the reference object ID. In our case, it should be the WikinewsNewsWebsiteobject (ID = 1) if you have not added other objects before. This argument is mandatory.- By default, the scraped items are not saved in the database. Append
-a do_action=yesotherwise. -a run_type=(TASK|SHELL)simulates task-based scraper operations invoked from the command line. It is useful for testing. We can leave out this argument for now.-a max_items_read={Int}and-a max_items_save={Int}override the scraper params, accordingly.-a max_pages_read={Int}limits the number of pages to read when using pagination.-a start_page=PAGEand/or-a end_page=PAGEsets the starting page and/or the last page.-a output_num_mp_response_bodies={Int}and-a output_num_dp_response_bodies={Int}log the complete response body content of the {Int} first main/detail page responses to the terminal for debugging. The beginnings/endings are marked with a unique string in the form ofRP_MP_{num}_STARTfor using full-text search for orientation.- Scrapy’s build-in output options
--output=FILEand--output-format=FORMATallows items to be saved as a file. DO NOT use this feature with-a do_action=yes
Now, we start Wikinews scraper by running this command:
scrapy crawl article_spider -a id=1 -a do_action=yes
Here are some news articles logged in the terminal output.
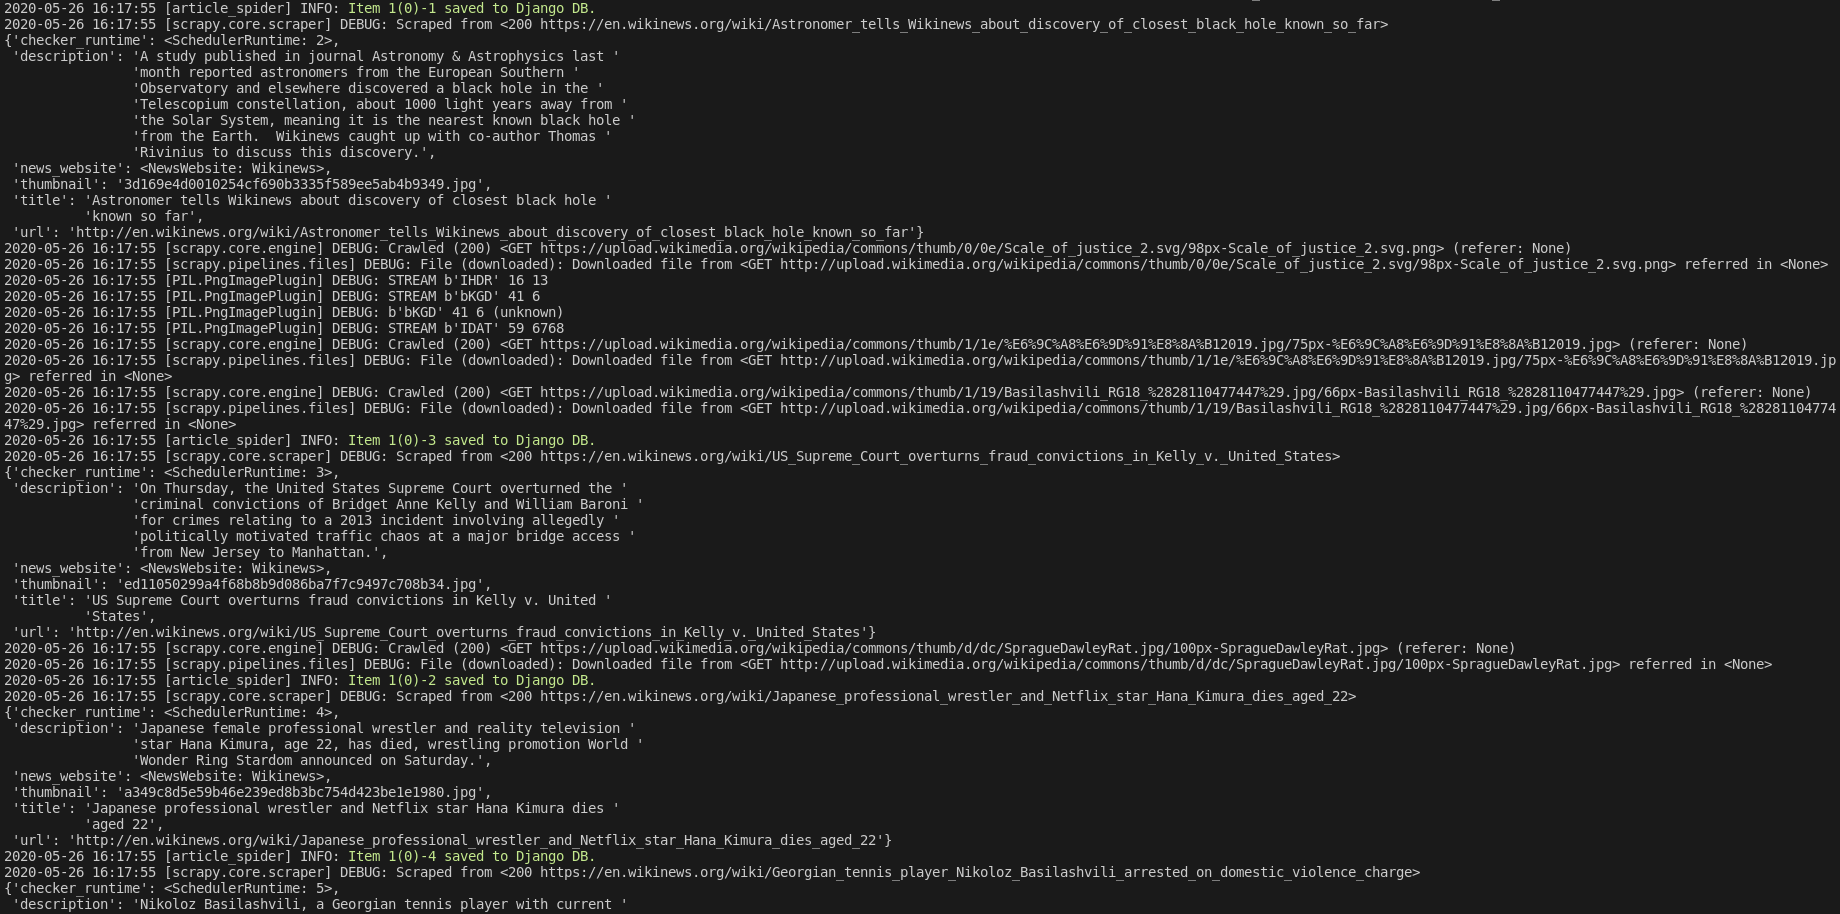
In Django admin dashboard > Articles, we should see the latest articles for Wikinews.
